How to Disable SmartScreen in Windows 10/8.
From Windows 8 onwards, the SmartScreen filter feature is used to prevent malware from running on Windows 8, 10 and 11 computers.
In fact, Windows Defender's SmartScreen filter is used together with antivirus and firewall to provide an additional layer of protection on the latest Windows operating systems against malware downloading and execution.
For example, if you try to open an application from Internet, SmartScreen prevents it from running and displays the following warning: "Windows protected your PC. Microsoft Defender SmartScreen prevented an unrecognized app from starting. Running this app might put you PC at risk."
But in some cases the Windows Defender SmartScreen feature becomes annoying when you try to download or open a legal application from the Internet. In that cases you can temporarily disable the SmartScreen filter in order to do your work and re-enable it when you finish.
In this tutorial you can find step by step instructions on how to disable the SmartScreen filter on Windows 11, 10, 8 or 8.1 OS.
How to Turn Off the Windows Defender SmartScreen Filter on Windows 11 & Windows 10 (newer versions).
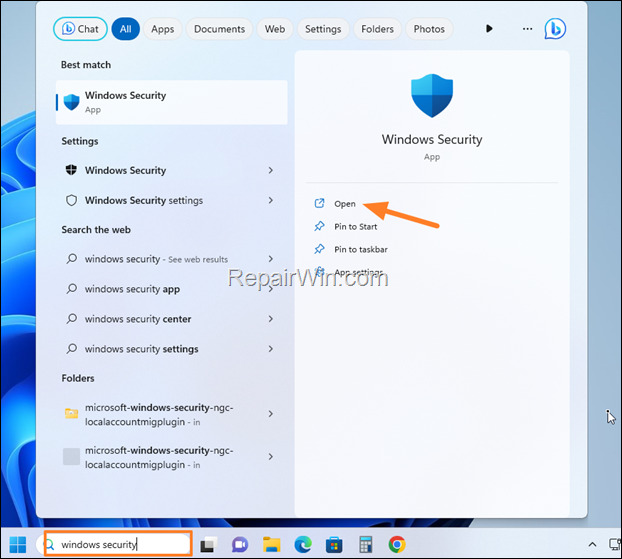
1. Type "windows security" in search and then open the Windows Security app.
2. Select App & browser control on the left and then click Reputation-based protection settings on the right.
3. Set the Check app and files switch to Off, to stop SmartScreen to check and block unrecognized apps and files.*
* Note: To re-enable the SmartScreen filter set the Check app and files switch to ON.
How to Disable SmartScreen in older versions of Windows 10 & Windows 8/8.1
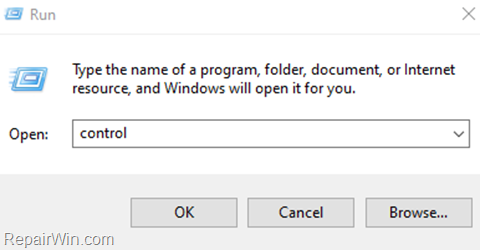
1. Open Windows Control Panel. In case you don’t know how to do that, here is what you have to do:
1. Press Windows ![]() + R keys to open the Run command box.
+ R keys to open the Run command box.
2. Type control and press OK (or Enter)
2. Click System and Security and then click Action Center.
3. Click the drop-down arrow next to Security.
4. Scroll down at security settings until you find the Windows SmartScreen and then press Change Settings.
5. Select the Don’t do anything (turn off Windows SmartScreen) option and choose OK.
How to Enable (Turn ON) Smart Screen Filter in Windows 10 older versions or in Windows 8/8.1.
To enable SmartScreen filter again, just follow the above procedure, but this time check the Get administrator approval before running an unrecognized application from the Internet (recommended) option & choose OK.
That’s all folks! Did it work for you?
Please leave a comment in the comment section below or even better: like and share this blog post in the social networks to help spread the word about this.
- Windows failed to apply the {F312195E-3D9D-447A-A3F5-08DFFA24735E} settings in gpupdate /force command (Solved) - July 23, 2024
- FIX: PC Turns On But no Display on Screen. - July 16, 2024
- FIX: No Disk that can be used for recovering the system disk can be found in System Restore (Solved) - July 10, 2024


