How to Back up Files in Windows (All Versions).
In this tutorial you will find instructions on how to manually back up your files, or to automatically back up them using the Backup and Restore (Windows 7) utility. (If Windows can't start, see the instructions on this article: How to rescue your files without booting to Windows)
The frequent backup of your data guarantees that you won't lose your important files for any reason (eg after a hard drive crash, malware attack or accidental deletion).
To manually backup your files in Windows, copy and paste on another storage device (e.g. a USB disk),* at least your user profile folder (C:\Users\<YOURUSERNAME>),** and then any other folder your need.
* Notes:
1. The only reliable way to backup your data, is to copy them to another storage medium (e.g. to an external USB dive, NAS or Network location).
2. Usually all the important files are stored on the following folders under the "C:\Users\<YOURUSERNAME>\" folder:
- Desktop, Documents, Downloads, Music, Pictures, Videos.
In Windows you have also the ability to back up your files using the Backup and Restore (Windows 7) utility, which allows you to copy your important files to another storage device (e.g. a USB drive), so you can restore them at any time on any computer, even and if your current computer stops working.
The Windows 'Backup and Restore (Windows 7)' utility exists in Windows 7, 8, 10 & 11 versions and gives also the ability to automatically create backup copies at a scheduled date and time. *
* IMPORTANT: Having a recent copy of your personal files to another storage device (e.g. to a USB disk), will ensure that you never lose your data even if your computer crashes.
- Related Article: How to Backup Files if Windows Cannot Start (Won't Boot).
How to Backup your Personal Files with Backup and Restore on Windows 11/10/8 & 7 OS.
To back-up your files using the Windows Backup & Restore utility:
1. Connect an external USB Drive with enough free space on your PC.
2. Close all open programs and apps.
3. In the search box, type control panel and then open the Control Panel app.
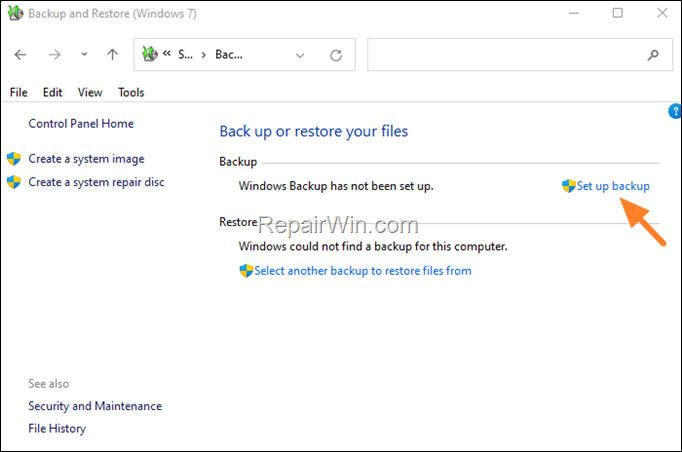
2. In Control Panel open Backup and Restore (Windows 7)
3. Click Set up backup.
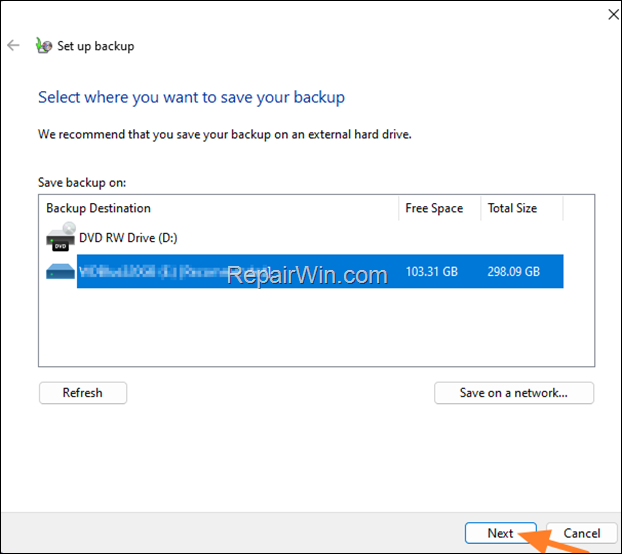
4. At the next screen, select the USB external drive as the backup destination and click Next.
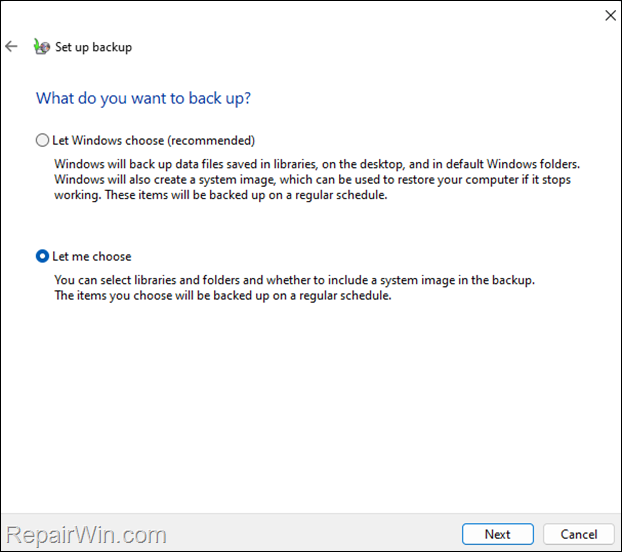
4. At "What do you want to backup screen", choose one of the following options and click Next:*
-
Let Windows choose (Recommended): Choose this option if you want to back up only files stored in the user profile folder(s) and to create a system image that will contain a full backup of your system. This is the best option for most users, especially if you don't need to back up files that exist outside of the "C:\Users" folder. (If you select this option skip to step-6 below.
-
Let me choose: Select this option if you want to manually select specific folders to include in the backup, or if you need to back up folders outside of the "C:\Users" folder. Additionally, you'll have the option to create or not a system image during the backup. The "Let me choose" option is recommended in cases where a folder/file outside of the "C:\Users" folder, need to be included in the backup [e.g. the folder "Private" in disk C (C:\Private)], or if don't want to create a system image.*
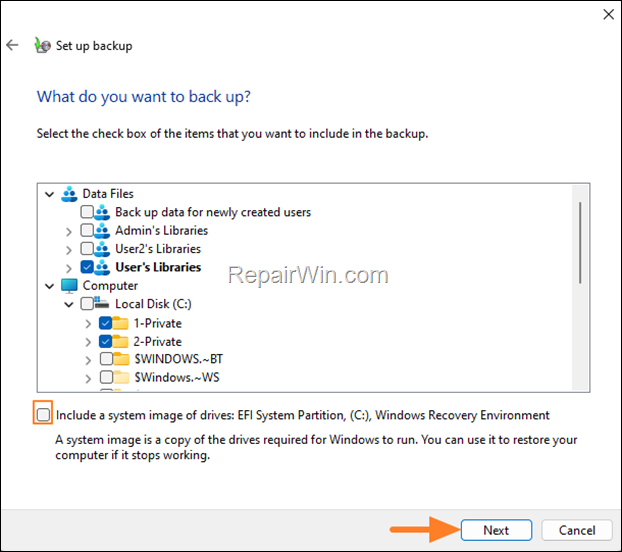
5. On the next screen, select which profile folders you want to back up (or leave the default selections) and then select any other folder(s) you want to include in the backup. Also, if you don't to create a system image, uncheck the relevant box.* When done, click Next.
* Note: If you don't have enough storage space in the backup destination (USB Drive), uncheck the "Include a system image…" checkbox.
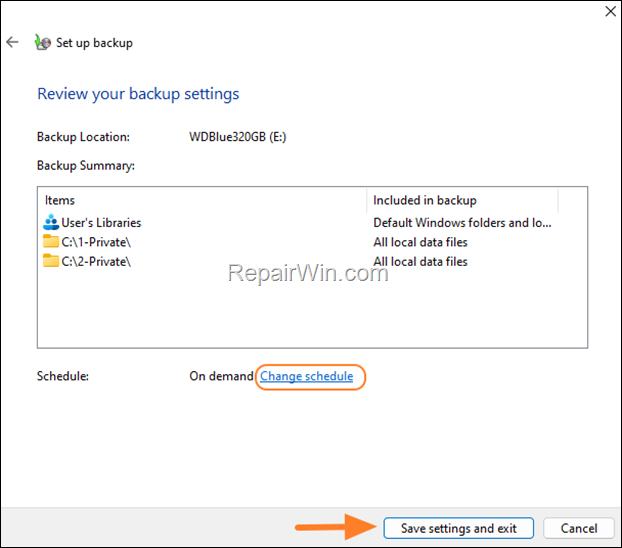
6. Finally, review your selections and if you want click Change schedule if you want Windows to backup the selected folders/files automatically at scheduled date and time.* When done, click Save settings and run backup.
* Note: Leave "On Demand" to run the backup job once or whenever you want. You can change the schedule later.
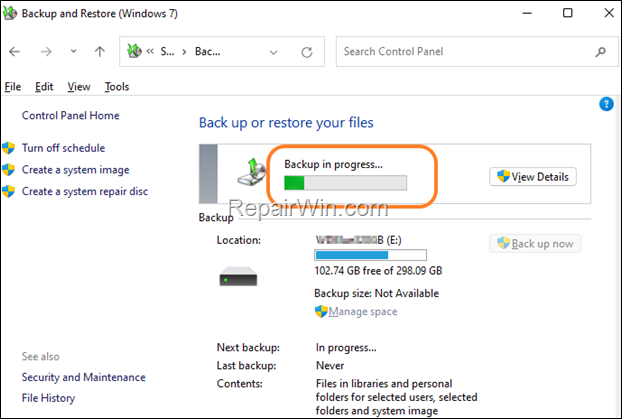
7. The Backup operation will start. Monitor the backup progress and wait for it to complete.*
* Note: If you want to stop the current backup operation, click View Details and then Stop Backup.
8. When it's done, you'll have a backup of your files on the external drive, on a folder named with the name of your PC.
Windows Backup & Restore Options:
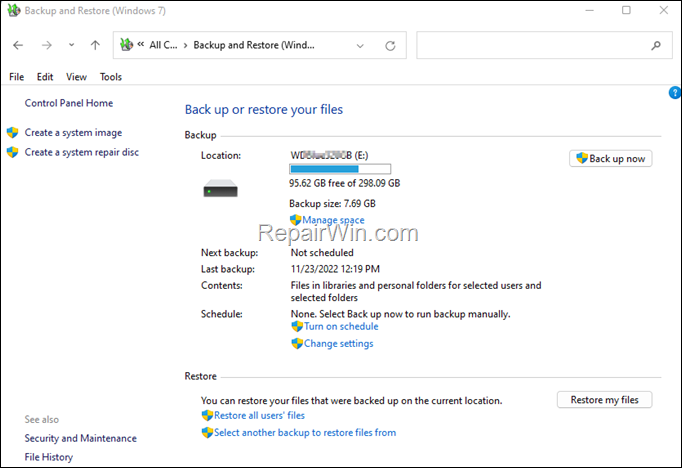
In the main window of the Backup and Restore (Windows 7), you have the following options:
-
Backup now: To backup files immediately.
-
Manage space: To view the space used from the backup(s) and to delete them if you want.
-
Turn on/off schedule: To enable or disable the automatic backup at a scheduled time.
-
Change Settings: To change the backup destination (disk), or the folders you want to back up.
-
Restore my files: To restore your files from the backup.
How to Restore Files from Windows Backup & Restore.
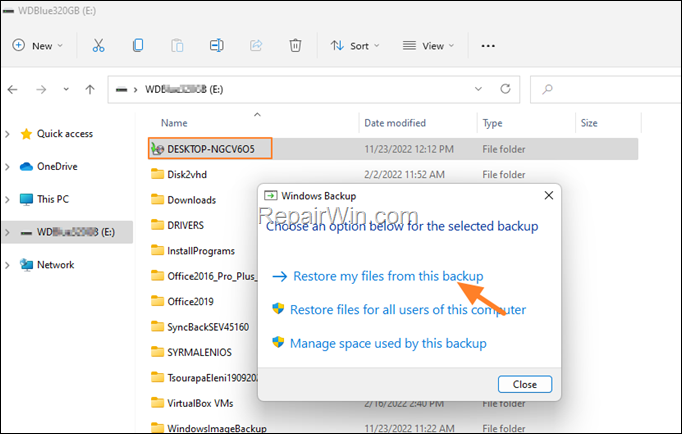
1. To restore your files from the backup, either double-click on the folder named with you computer name on the external drive. (or navigate to Control Panel and open Windows Backup & Restore).
2. Click Restore my files from this backup.
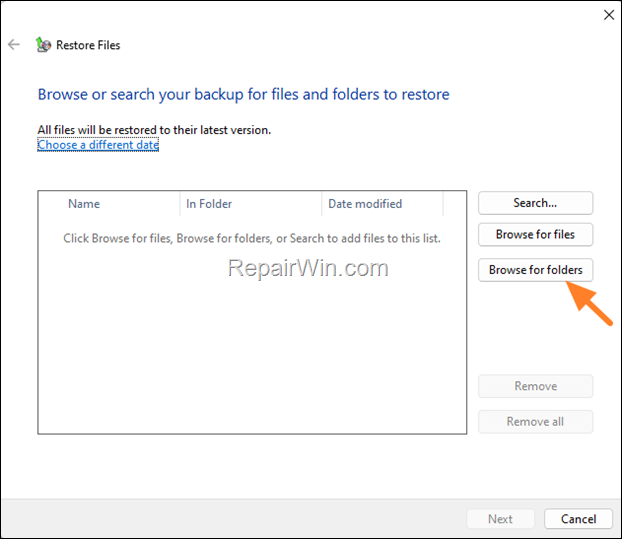
2. At the next screen select Browse for files if you want to restore individual files from the backup or click Browse for folders if if you want to restore an entire folder (as in this example).
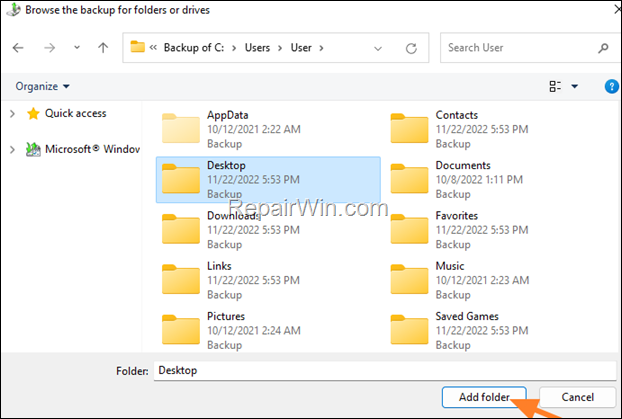
3. At the next screen explore the contents of the backup, select the folder that you want to restore and click Add folder.
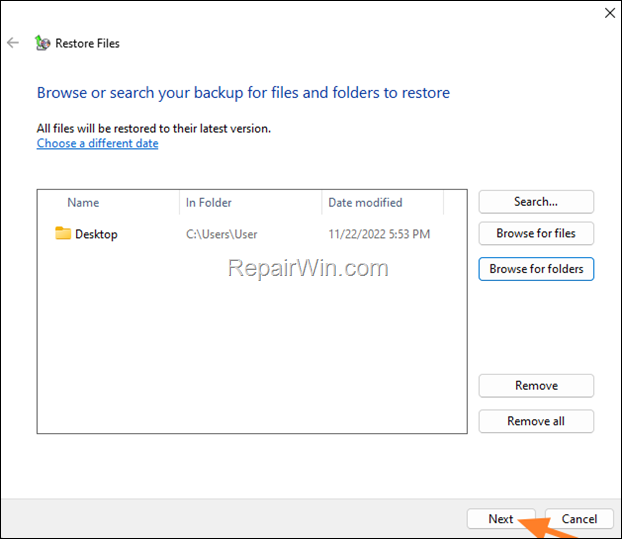
4. When done, click Next.
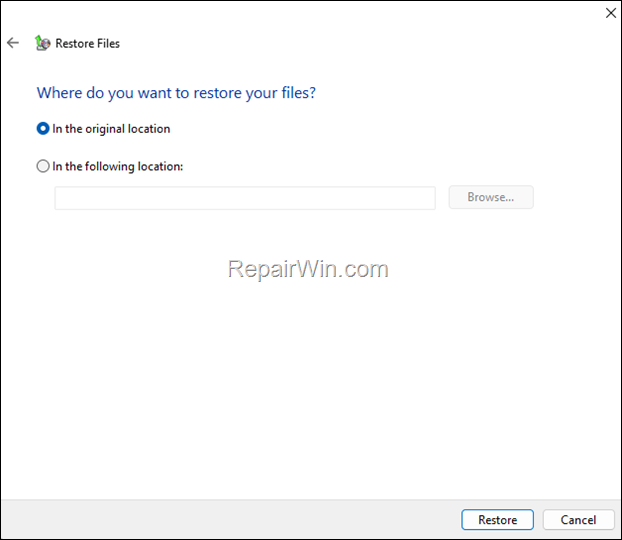
5. Now, choose where you want to restore the select folder and click the Restore button to restore it. *
* Note : If you don't want to replace/overwrite the files in the original location, select "In the following location" and then select a different location than the original to restore your files.
That's all folks! Please leave a comment in the comment section below or even better: like and share this blog post in the social networks to help spread the word about this solution.
- Windows failed to apply the {F312195E-3D9D-447A-A3F5-08DFFA24735E} settings in gpupdate /force command (Solved) - July 23, 2024
- FIX: PC Turns On But no Display on Screen. - July 16, 2024
- FIX: No Disk that can be used for recovering the system disk can be found in System Restore (Solved) - July 10, 2024


